Posts

Showing posts from February, 2019

New Battery Pack Boards

Image
I designed these boards to interface the battery cells the best way I knew how: Screw the tabs to each other!  This was the best method I could come up with after trying to solder and even spot weld the tabs together.  These boards were made by Sunstone Circuits and I was really impressed with the results.  Aside from the box itself, the only thing holding the cells together are these boards, so it was imperative that they were thick as hell.  The traces also had to be thick enough to support 60 amps of continuous current, which is the max continuous current that the cells can reasonably handle.  Points to anyone who can figure out where the logo came from.

Time For Some Aesthetics II

Image
Running with the excitement over the last style effort, I decided to neglect the actual mechanics of the bike and continue to make it look pretty.  Pictured here is the new headlight, as well as the new fiberglass "tank", and some freshly stained wooden motorcycle parts.  And being confident with the battery pack design I made a bunch of containers for the battery cells.  Almost everything you see in this picture will be subject to at least one more pass at a better design.

Time For Some Aesthetics

Image
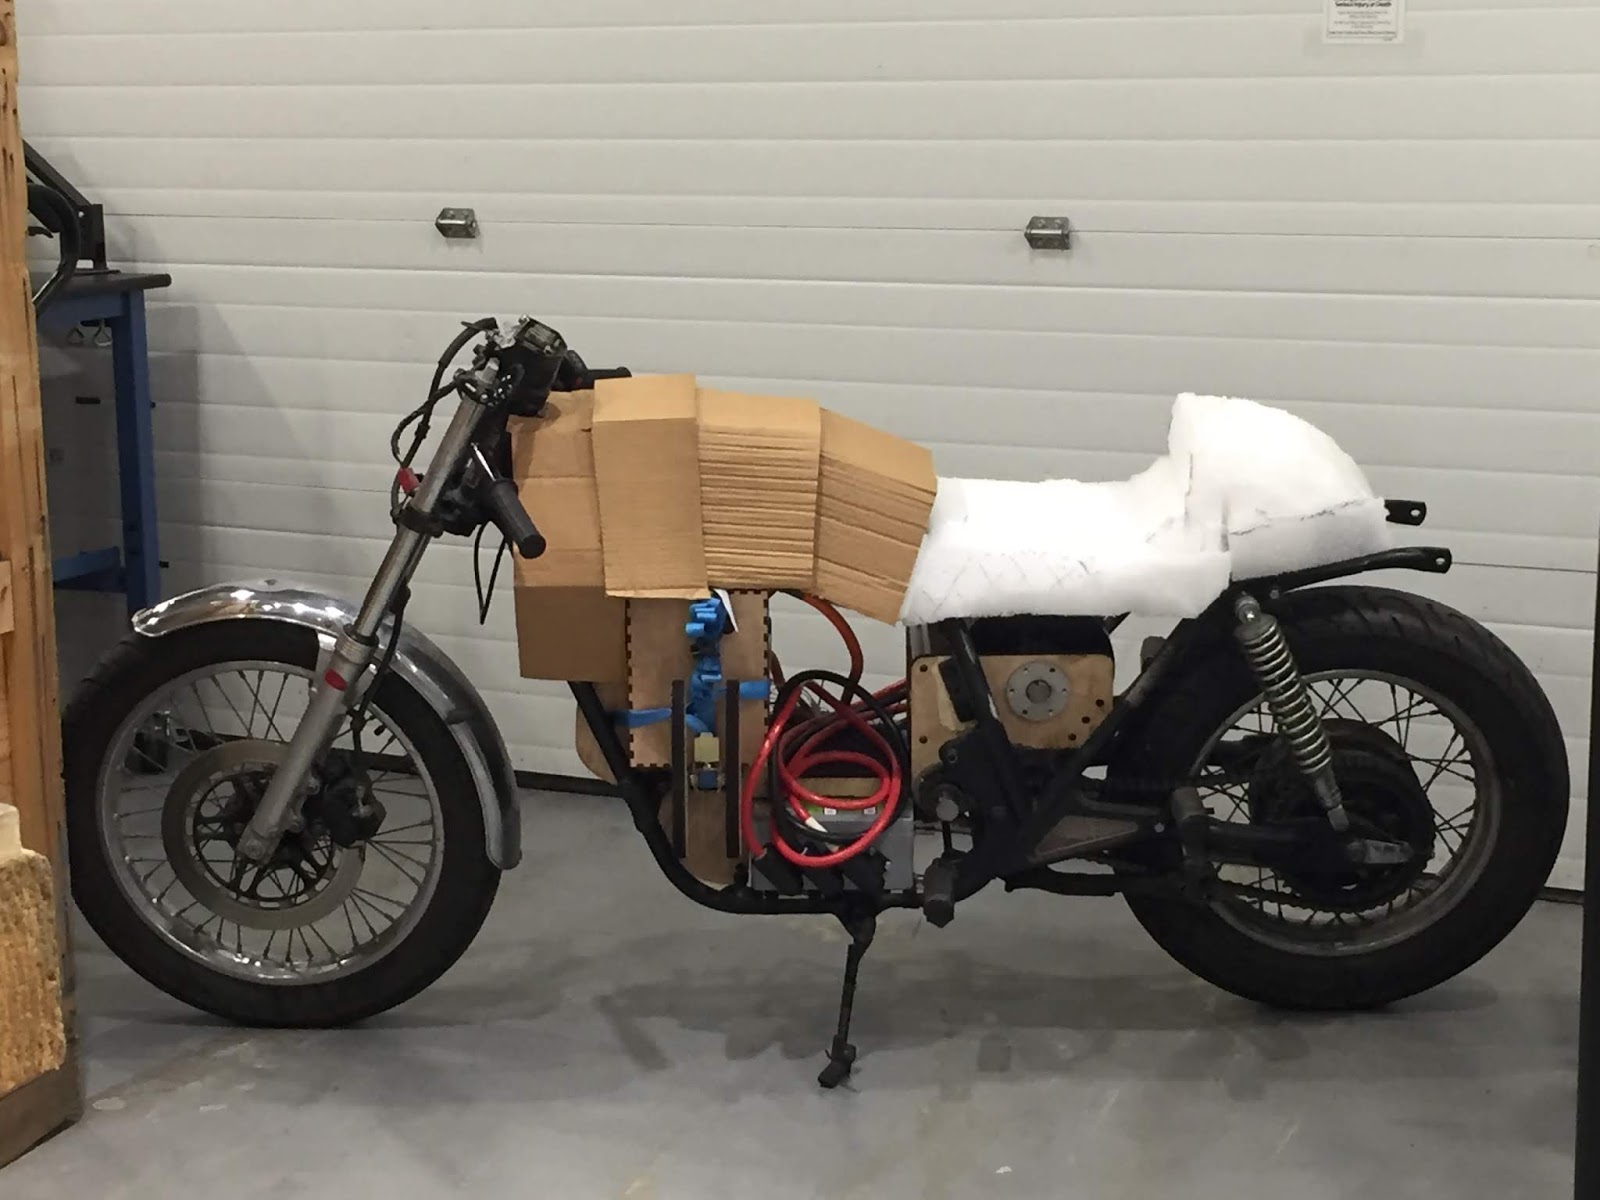
Being somewhat happy with the way the battery/motor setup turned out, I decided to breathe some life into the style of the motorcycle.  As I mentioned before, I wanted to go for the cafe racer style, but with a unique take.  I started with the lowered handlebars and got onto crafting a seat and "gas tank".  I was really excited to finally see things starting to take shape.  Rather than a frame with electronics strapped to it, I felt like I finally had a proper motorcycle.  Later on I used the cardboard mockup as support for laying down some fiberglass, which will act as a cover for the high power electronics that are used for controlling the power to the bike.

A New Powertrain

Image
Realizing that a floating chain tensioner is going to become unpredictable at higher speeds I opted to redesign the way the motor transfers motion to the rear wheel.  I learned the hard way that the chain driving the rear wheel absolutely has to sit in front of the pivot point of the rear forks, otherwise the chain just becomes loose as the bike moves up and down.  Here I have the motor mount V2, which has a chain running from the motor to a shaft which has its own chain running to the rear wheel.  This was a dramatic improvement over the last design, but it introduced a new problem of how to tension the chain between the motor and shaft.  It was also terribly noisy.  Here I also finalized the placement of the motor controller and tested out the design of the battery pack support.  I was happily surprised at how well the wooden test pieces held up under load.  It gave me hope for when I finally have everything mounted with metal.

Going for a Spin

Probably the third test ride.  I've still got the ridiculous wooden chain tensioner but I'm finally using the lithium-ion battery packs I built.  Right about now is when I started learning the voltage/current rule:  Voltage directly relates to the speed of the motor, and current directly relates to how fast I can get to that speed.  Since I didn't want to put the batteries in parallel I decided to use the gearing to optimize for the torque I wanted with the batteries wired in series.  This way I always have the torque on demand, and if I want the bike to be faster I just add more batteries in series (increase the voltage).  The side benefit to this is I can configure the bike for city driving with less battery weight and highway driving with more battery weight.  Think of it like a smaller gas tank that reduces the weight of the car when you don't need to travel long distances.

How to Make the Electrons Move

Image
At some point it dawned on me that lead-acid batteries just won't cut it.  From this point on I've been using these battery pack built from scratch using 20 amp-hour lithium-ion cells.  Lithium-ion packs give me the power I need while still being lightweight enough to not feel like I have an overweight passenger riding with me at all times.  To put it into perspective, each of these packs weighs about ten pounds and has as much stored energy as a car battery.  The pack pictured is the very first prototype, using a circuit board fabricated in a PCB CNC machine.  It's also the first time I was scared by what I was making.  See picture for evidence of vaporized wire due to excess electron movement.

Foam Makes an Appearance

Image
I needed to figure out an okay way of supporting the battery packs, so I stole some insulation foam board from my friend's adventure van project to build some sort of spider like battery enclosure.  If you wanted to check out a project full of expert craftsmanship and creative talent I'd point you to his blog if he had one, otherwise you can continue reading mine.

Didn't Learn

Image
Having not learned from the previous design, I decided to double down on the idea that I can control the slack in the chain as the suspension rose and fell.  This was also the inception of the idea that wood makes a great prototyping material.  You can also see that I decided to support the motor on the rotating side as well (prior to this point the motor was only supported by the stationary side, which would have caused some terrible forces on the internal bearings and premature wear on the motor).  More wood to come.

The Maiden Voyage

Image
My design philosophy throughout this project was build it then try it, learn from that experience, then redesign it.  Here we have the very first self contained ridable prototype.  There's a nice nook underneath the seat that the motor fit perfectly in, and the batteries fit quite nicely where the combustion engine sat.  You can see my first attempt at delivering motion to the rear wheel by directly connecting the motor sprocket to the rear wheel sprocket by chain.  This method turned out to be a terrible idea since any movement in the rear suspension cause the distance between sprockets to shorten or stretch dramatically, causing the chain to droop and hop off the teeth.

Doing the Math

Image
With the help of my friend Alberto, we (he) did the math to figure out if the Emrax motor was worth trying out on this platform.  Turns out the way I geared the system initially would produce an acceleration of 2m/s^2, which is about 1/4 that of a Toyota Corolla, but a max speed of about 400mph.  Seeing as how it's probably illegal to go that fast, I decided to optimize the gearing such that the max speed is about 80mph and the acceleration of about 1.25 that of a Toyota Corolla.

The Powerhouse

The Emrax.  Designed for ultralight aircraft, this particular model takes up to 700vdc, can pull up to 240 amps, and spins up to 6000 rpm.  It is also liquid cooled.  The biggest problem with this little beast is figuring out how to provide it with enough power.  This was a test setup that I built to make sure I was smart enough to make it move.  Turns out I'm just smart enough to make it move.

The Concept

Image
My original plan was to find a shaft-driven bike and strap the biggest DC motor I could find to it, but with a chain-driven bike plopped into my lap I had to reconsider.  This is one of the concept sketches I made early on, which introduces the cafe racer style that I will inevitably be aiming for.  The big cylinder at the bottom is the motor and the vertical slats in the middle are the battery packs.  Both the motor and battery configuration had to change dramatically.

A Surprise Gift

Image
About two to three years ago I started talking about this crazy idea to build an electric motorcycle from scratch.  A few months later, my good friend and coworker decided I should shut up about it and get started so he gifted me his old parts bike.  It was a 1982 Honda CB750K rolling chassis with fully functional brakes, lights, and decent tires.  It completely caught me by surprise, but it was exactly the motivation I needed to get started.